
Yamaha XT 225 Serow Valve Adjustment
Originally posted to El Cantar de la Lluvia on Thursday, April 19, 2007
"But Paul, you have an XR, what is this XT 225 doing in one of your articles?"
Well, it's a guest, of course! This is Jano's bike, a 2001 Yamaha XT 225 Serow, a faithful and excellent bike that was ready for a valve adjustment.
Jano had noticed some valve noise that occurred during the first few seconds after the bike was started. This is normal, but he wanted to check his valve gap anyway.
He came to my house, and armed with the shop or service manual of the Yamaha XT 225 Serow (alternative link), we got to work.
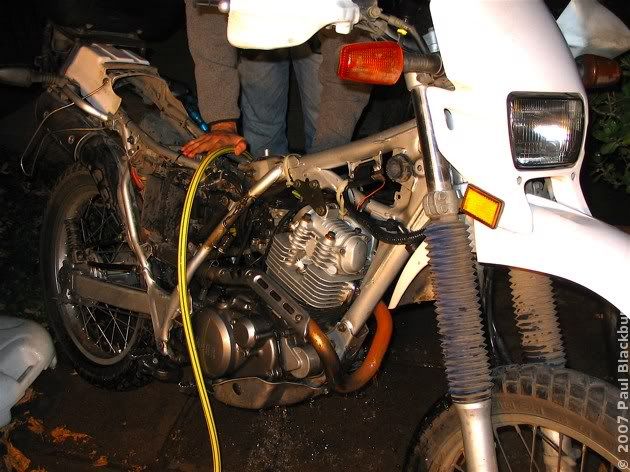
First, remove the seat.

The fan is there to cool the engine, since valve adjustments should be done with the bike stone cold, and he'd ridden it to my house.
Remove the gas tank fairing, then the tank itself. Since everything is dirty down there, we must clean it.
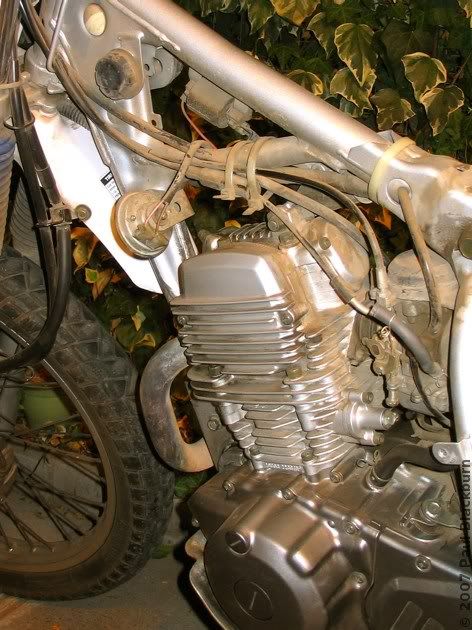
That's what we did: toothbrushes and de-greasing spray.
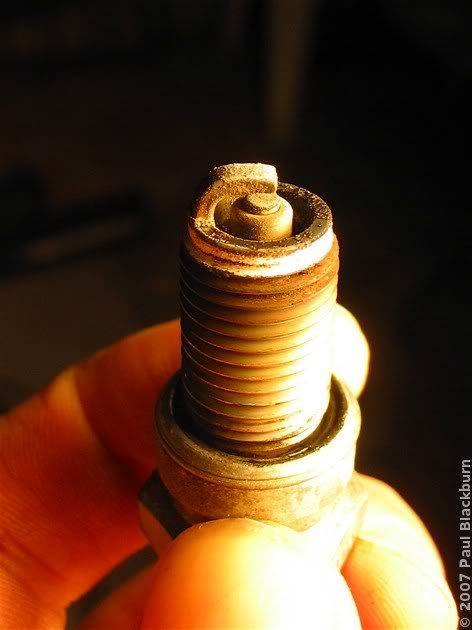
With everything completely dry, and the engine at ambient temperature, we removed the spark plug. I think the mix might be a bit poor.
Then, remove the two covers on the left side of the engine. Using a socket and an extension bar, just as you do with the XR, rotate the engine in the anti-clockwise direction, until the "T" mark is aligned with the mark visible through the top hole.
The pistom must be on its compression stroke as you align the T mark. To make sure that this is the case, both valve rockers should have some play. If they do, you're on the compression stroke. If they don't, you're on the exhaust stroke, and you should turn the engine one more time.

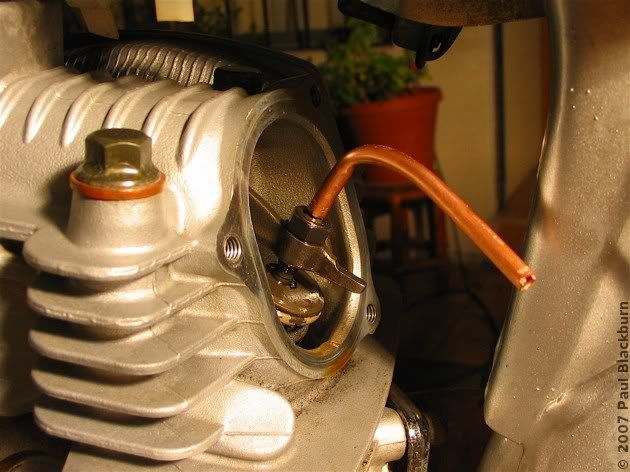
Remove the valve rocker covers. Here's the exhaust one.
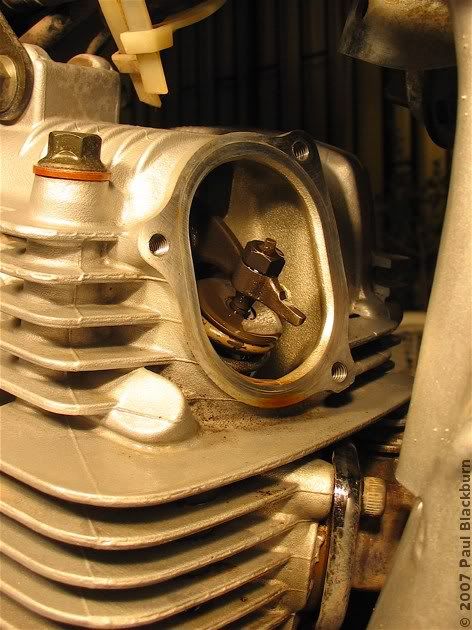
And the intake one.
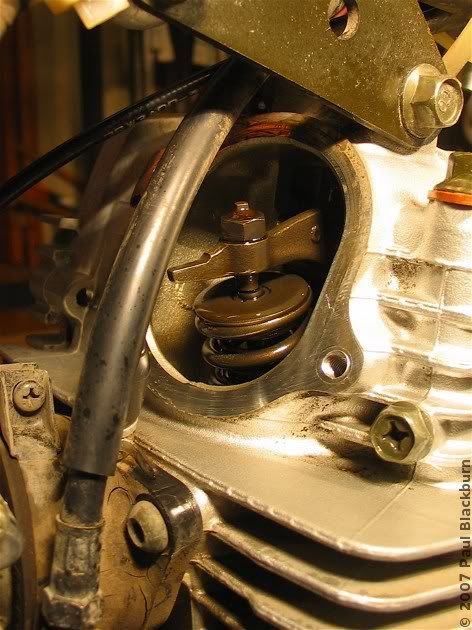
Loosen the lock nut with a 10 mm wrench. It will be necessary to turn the adjustment screw. For some strange reason this piece has a square head. Yes, you read that right. I had to make a simple tool to give it the right position. You can do it with needle-nosed pliers, but you'll go insane trying.
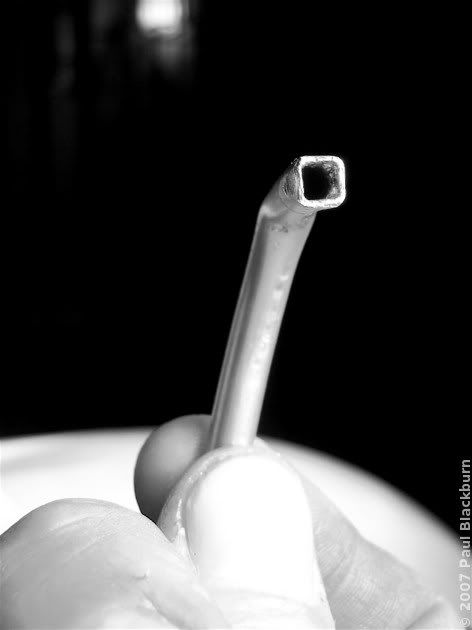
I made the tool out of copper tube, the type you use in refrigerators, and needle-nosed pliers. I inserted one of the pliers' jaws into the tube, and thus flattened one quarter of the tube's circumference. Pull it out, rotate 90º, squeeze. You can thus make a round tube into a square profile. The ridges on the pliers help file away any irregularities. Not bad!
To learn how to correctly use feelers to set the valve separation, read the article on the same procedure on the XR. We found that the exhaust valve gap was too large, so I adjusted it. The intake one was within the range specified by the shop manual.
And thus concludes the valve adjustment of this pretty bike.
"But Paul, you have an XR, what is this XT 225 doing in one of your articles?"
Well, it's a guest, of course! This is Jano's bike, a 2001 Yamaha XT 225 Serow, a faithful and excellent bike that was ready for a valve adjustment.
Jano had noticed some valve noise that occurred during the first few seconds after the bike was started. This is normal, but he wanted to check his valve gap anyway.
He came to my house, and armed with the shop or service manual of the Yamaha XT 225 Serow (alternative link), we got to work.
First, remove the seat.
The fan is there to cool the engine, since valve adjustments should be done with the bike stone cold, and he'd ridden it to my house.
Remove the gas tank fairing, then the tank itself. Since everything is dirty down there, we must clean it.
That's what we did: toothbrushes and de-greasing spray.
With everything completely dry, and the engine at ambient temperature, we removed the spark plug. I think the mix might be a bit poor.
Then, remove the two covers on the left side of the engine. Using a socket and an extension bar, just as you do with the XR, rotate the engine in the anti-clockwise direction, until the "T" mark is aligned with the mark visible through the top hole.
The pistom must be on its compression stroke as you align the T mark. To make sure that this is the case, both valve rockers should have some play. If they do, you're on the compression stroke. If they don't, you're on the exhaust stroke, and you should turn the engine one more time.
Remove the valve rocker covers. Here's the exhaust one.
And the intake one.
Loosen the lock nut with a 10 mm wrench. It will be necessary to turn the adjustment screw. For some strange reason this piece has a square head. Yes, you read that right. I had to make a simple tool to give it the right position. You can do it with needle-nosed pliers, but you'll go insane trying.
I made the tool out of copper tube, the type you use in refrigerators, and needle-nosed pliers. I inserted one of the pliers' jaws into the tube, and thus flattened one quarter of the tube's circumference. Pull it out, rotate 90º, squeeze. You can thus make a round tube into a square profile. The ridges on the pliers help file away any irregularities. Not bad!
To learn how to correctly use feelers to set the valve separation, read the article on the same procedure on the XR. We found that the exhaust valve gap was too large, so I adjusted it. The intake one was within the range specified by the shop manual.
And thus concludes the valve adjustment of this pretty bike.
Labels: mechanics
posted by durandal at 1:51 PM
![]()


 The Lagoons of the Santuario de la Naturaleza 2: Laguna Los Ángeles
 Race Day At Leyda 4
 El Tabo and the Central Hidroeléctrica El Sauce
 Exploring The Hills Around Lampa
 A Different Route To Baños De Colina
 The Mines of the Cuesta La Dormida
 The Frozen Lagoons of the Santuario de la Naturaleza
 Second Mass Demonstration "For A Fair Tag"
 First Mass Demonstration Against The 'Tag'
 Enduro In Lagunillas
 Embalse El Yeso and Termas Del Plomo
 Ride To Peñuelas
 Cerro Chena
 Race Day at Leyda 3
 Baños de Colina 2
 Carretera Austral: Epilogue
 The Little Giant and Termas del Plomo
 Back on Two Wheels
 2006 Photographic Retrospective
 Race Day At Leyda 2
  Quantum Optics III in Pucón
 Meseta In Chicureo
 Pick Up Your Beer Bottle And Fuck Off
  Planes And Hills
 Cut-Off Road
 Lagunillas
 Laguna Verde 2
 Ride To Anywhere But Aculeo
 Cerro El Roble, Second Attempt
 Baños De Colina
 Some Walk On Water...
 Race Day At Leyda
 Almost Cerro El Roble
 Off To Curacaví with Andrés
 La Serena, Part 3: Back To Santiago
  A Bull, Two Cows and a Chilean Fox
 Escape To Cuesta La Dormida
 Valve Adjustment
 La Serena, Part 2B: Valle Del Elqui
 La Serena, Part 2A: Coquimbo and La Recova
 Mud And Pine Trees
 La Serena, Part 1
 Pimp My Exhaust
 Ride To Laguna Verde
 Ride To La Mina
 Ride To Termas El Plomo
 Camping in Colliguay
 Ride To Portillo
 Ride To Olmué and Con Con
 Siete Tazas
 Watching The Departure Of The Day That Brought Me Here
 Buenos Aires Motorbikes
 Ride to Talca with the Adach Group
 Las Trancas '05
 Towers and Hills
 María Pinto, Melipilla, Aculeo
 Me and my Carb


2 Comments:
I've learned that one can use 12-point sockets (or 12-point box-end wrench) on square nuts/bolts. This makes perfect sense when you think about it - a 12-point socket can be thought of as 2 overlapping 6-point ones, or 3 overlapping 4-point ones.
You did well with the copper tube, sure :)
Wouldn't an open end wrench be simple enough?
Post a Comment
<< Home